KRISTINE MASTERSON
  • Home
    • About
    • Instagram
    • More Masterson
    • Favorite Resources
  • Makes
    • Items >
      • Accessories
      • Bottoms
      • Costumes
      • Dresses
      • Masks
      • Outerwear
      • Rompers
      • Scarves
      • Skirts
      • Tops
    • Challenges >
      • Clothing Capsules
      • CSOTD
      • Make Nine
      • OOTD
  • Fabric
    • Fabric Types
  • DIY
    • Accessories
    • Christmas
    • Cricut
    • Epoxy Resin
    • Home Decor
    • Organization
    • Screen Printing
    • Sewing Planner
  • Shop
Picture

Christmas Cookies Tree Skirt

11/19/2021

Picture

Christmas Cookies Tree Skirt

I am in awe of this project. I usually avoid ones like this because they scare me. But I just went for it because I REALLY wanted a tree skirt with this cookie fabric! I let go of the outcome and the outcome is amazing. 
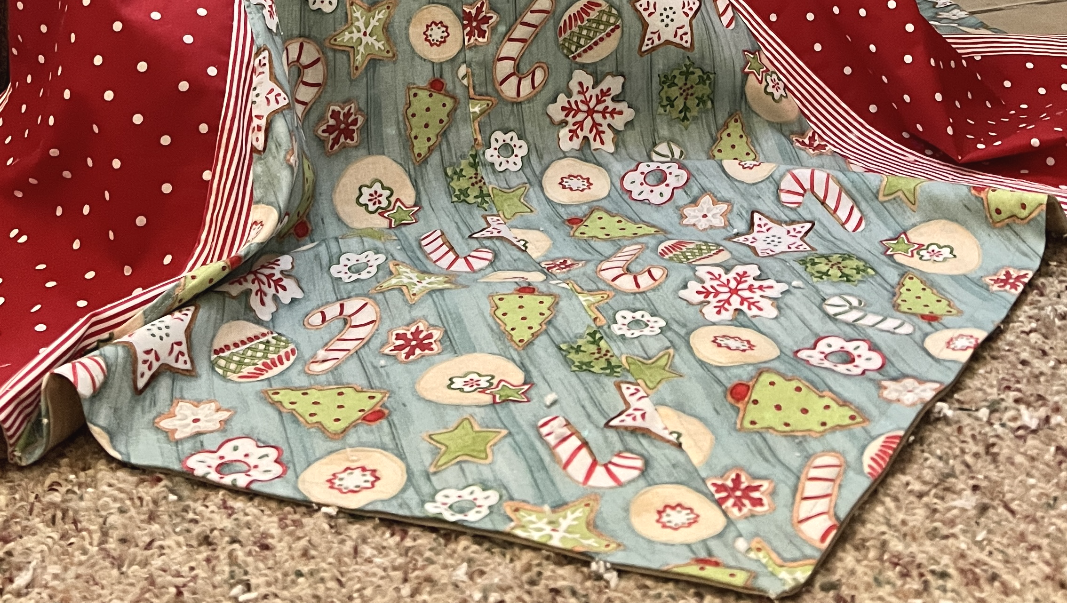
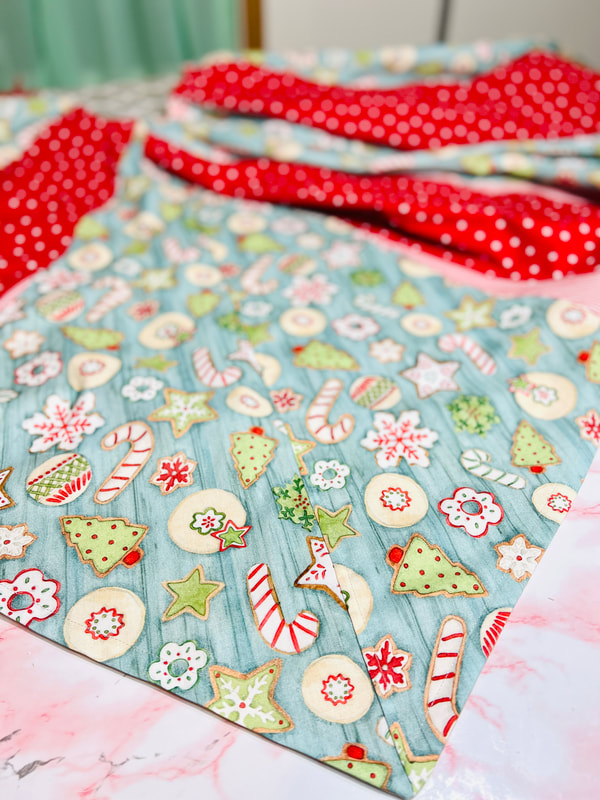
The construction of the tree skirt is very simple. You can use any circle skirt pattern and viola you have a skirt for your tree. The trick comes in when finishing the seams so they won't fray. From what I read, one method is to make two entire tree skirts and sew them with right sides together, turn them, then finish the opening. I really didn't want to come up with that much fabric, so I did French seams.

Using my Circle Skirt Pattern to Make a Star Tree Skirt
  1. I have a 1/2 circle skirt pattern that I folded in half, then folded in half again to get the size I wanted for the panel. I traced the folded circle skirt to create a new pattern piece that I used for my tree skirt panels.
  2. The bottom of the circle skirt panel piece is rounded, so I extended that to a point and made the curved top into a 'V'. I didn't want the 'V' too sharp though because I knew a more relaxed 'V' would make finishing the top later much easier.
  3. Fold the pattern piece in half to ensure both sides are exactly the same.
  4. I cut the blue cookie panels out in halves and sewed them together down the middle. This really helped to make my fabric go further.
  5. The red pieces were sewn together with vertically straight edges, then cut down to get the slanted sides. I did this because (a) I wasn't sure what I was doing and (b) I had much less of the red fabrics than I did of the blue, so I needed to make the red panels smaller than the blue ones. I just made sure the sides of the red panels would fit perfectly with the sides of the blue panels.

How I did French Seams
  1. Sew each panel together with roughly 3/8" seam allowance. 
  2. Press the seam to one side.
  3. Fold the seam under itself (back toward the stitches) and press.
  4. Stitch along the new hem very close to the edge to finish.

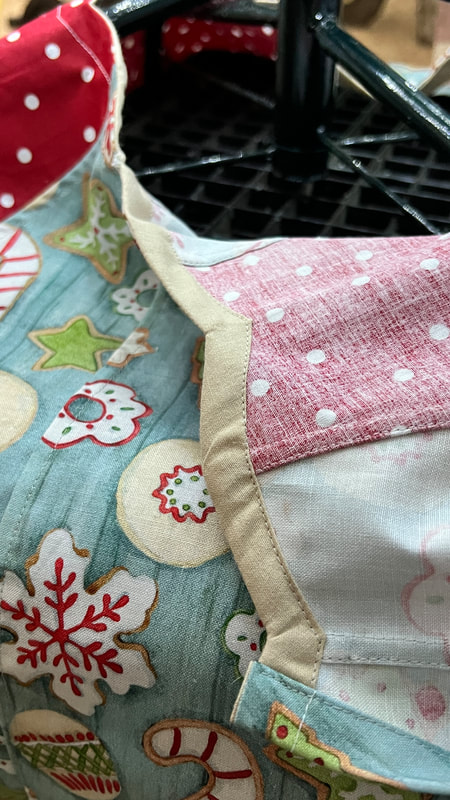
To finish the top and bottom of the skirt, I made facings. I used muslin because it is super light weight and inexpensive. I included a picture below of the top facing. It looks like bias tape with it is finished, but is much easier to work with all the angles of the skirt. I added the bottom facing to each of the main panels before sewing them together (ie sew two blue together, then add facing, then sew to a finished red panel).

How I did the Bottom Facings
  1. Lay the bottom of the panel on your facing material with right sides together. 
  2. Cut the facing material to exactly fit the entire panel bottom up to one inch up the side.
  3. I used the selvage edge and didn't hem, but if the top edge of the facing is raw, you will need to fold it over twice, press and hem.
  4. Sew the facing (right sides together) to the bottom of the panel only along with bottom (do not sew up the sides.
  5. Flip the facing over to the wrong side of the panel, press, and stitch about 3/8" from the bottom of the panel.

Once the bottom facings were done, I sewed all the panels together, then finished the rest of the French seams, but not the final two edges of the skirt. Finishing the top of the skirt with a facing was much easier than anticipated, too.

How I did the Top Facing
  1. Cut a piece of facing material bog enough to cover the hole in the top of the skirt with a few inches beyond the edge.
  2. Lay the skirt on the facing material with right sides together.
  3. Trim the facing to fit the top of the skirt and open edge (I left mine bigger than the top of the skirt and cut it about an inch from the edge opening in case things shifted while sewing).
  4. Sew the facing to the skirt around the opening only (do no sew down the sides of the edges).
  5. Trim an excess of the facing material as needed, then flip to the wrong side of the skirt.
  6. Fold the edge of the facing under and press, following along the pattern of the top edge of the skirt.
  7. Stitch close to the edge of the hem to finish.

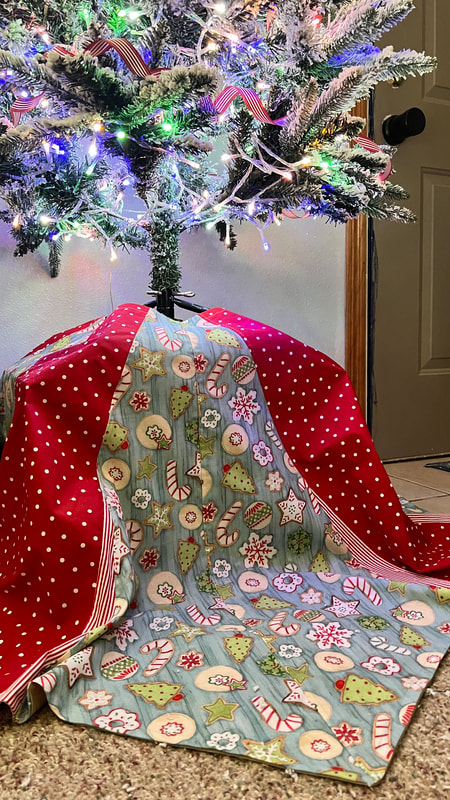
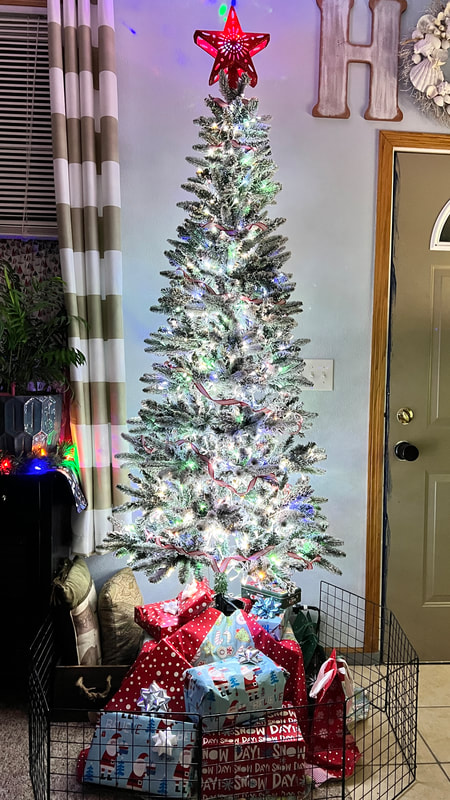
Then all that was left was to finish the two last edges of the skirt by folding them over twice, pressing and stitching. I didn't add ties because my tree skirt needed to go over a crate (put there to keep a naughty rabbit from eating the tree) and I wanted to make sure it would fit before committing to sewing on ties. It fits perfectly (husband thought it was going to be humongous lol), but now the problem is snagging it when the rabbit isn't sleeping on it so I can add those ties!


Leave a Reply.

    Categories

    All
    Accessories
    Christmas
    Cricut
    Epoxy Resin
    Home Decor
    Organization
    Screen Printing
    Sewing Planner

    Archives

    November 2022
    November 2021
    August 2021
    June 2021
    December 2020
    November 2020
    October 2020
    June 2019
    November 2017
    July 2017

    RSS Feed

Copyright Kristine Masterson 2014 to Present. All rights reserved.


Powered by Create your own unique website with customizable templates.
  • Home
    • About
    • Instagram
    • More Masterson
    • Favorite Resources
  • Makes
    • Items >
      • Accessories
      • Bottoms
      • Costumes
      • Dresses
      • Masks
      • Outerwear
      • Rompers
      • Scarves
      • Skirts
      • Tops
    • Challenges >
      • Clothing Capsules
      • CSOTD
      • Make Nine
      • OOTD
  • Fabric
    • Fabric Types
  • DIY
    • Accessories
    • Christmas
    • Cricut
    • Epoxy Resin
    • Home Decor
    • Organization
    • Screen Printing
    • Sewing Planner
  • Shop